
If you want to create more dynamic typography and realistic depth effects in your designs, learning how to distort the perspective of an object using Adobe Illustrator is an incredibly useful skill. Whether you’re working on text effects, logos, or creative layouts, this simple technique can make flat artwork feel much more dimensional.
Before we jump in, you can download a free trial of Adobe Illustrator if you don’t already have it installed.
One of the best parts about this method is that you don’t need complicated 3D tools or advanced effects. Illustrator already includes everything you need through the Free Transform Tool. Once you understand the difference between Free Transform, Perspective Distort, and Free Distort, you can quickly create convincing perspective effects in just a few minutes.
Finding the Free Transform Tool in Adobe Illustrator
To begin, open your object or text inside Adobe Illustrator. In the tutorial example, we start with a simple shape — an “O” rotated onto its side.
The tool we’ll use is the Free Transform Tool. You can usually find this in the left toolbar. If you don’t see it immediately, there are two quick ways to locate it.
First, check your toolbar settings near the bottom of the toolbar panel. You can customize and add missing tools there.
Another option is to go to Window > Toolbars > Advanced. This expands Illustrator’s toolbar and reveals additional tools that may be hidden in the simplified workspace.
Once selected, the Free Transform Tool displays a small floating taskbar with multiple distortion options.
These options include:
- Free Transform
- Perspective Distort
- Free Distort
Each one behaves differently, and understanding how they work is important if you want more control over your designs.
Understanding Perspective Distort vs Free Distort
When learning how to distort the perspective of an object using Adobe Illustrator, most beginners confuse Perspective Distort with Free Distort. While they seem similar, they produce very different results.
Perspective Distort
Perspective Distort keeps the transformation consistent on both sides of the object.
For example, when dragging the top corners inward, both sides move evenly. This creates the illusion that the object is moving away into the distance.
This effect works especially well for:
- Perspective typography
- Signage mockups
- Objects fading into space
- Directional layouts
You can also drag the side handles upward or downward to create left or right perspective angles.
Because the movement stays proportional, Perspective Distort is great for cleaner and more controlled perspective adjustments.
Free Distort
Free Distort gives you much more flexibility.
Instead of keeping both sides symmetrical, you can independently drag corners wherever you want. This is perfect for creating more dramatic or realistic perspective effects.
In the tutorial example, the bottom of the shape is widened while the top is narrowed slightly. This makes the object appear like it’s laying flat on a surface.
Small adjustments work best here. Tiny movements create more believable depth.
The important thing is maintaining visual balance while dragging the anchor points. Uneven distortions can quickly make the design look accidental instead of intentional.
How to Distort Text in Adobe Illustrator
The same technique also works extremely well with typography.
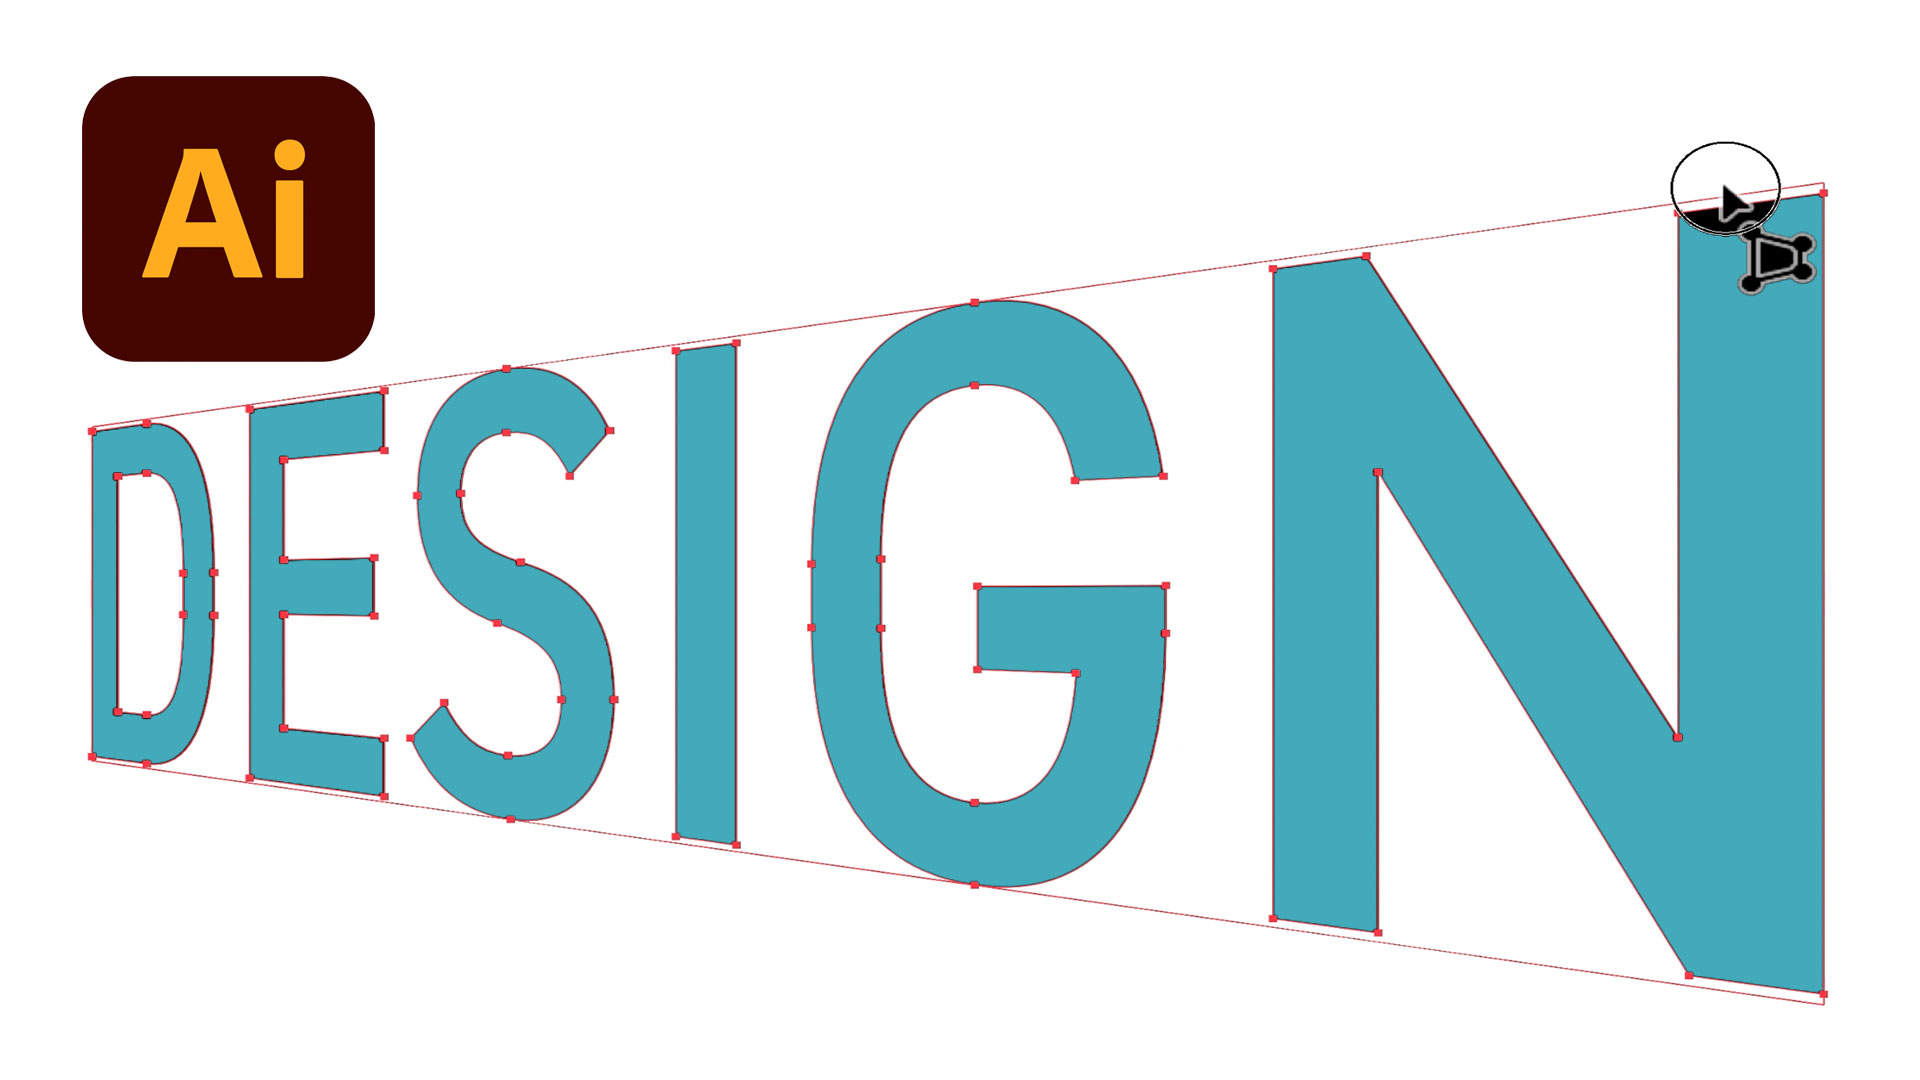
To start, select the Type Tool and type your desired word. In the tutorial, the word “Design” is used as the example.
Before applying distortion effects, you’ll want to convert your text into editable shapes.
Go to:
Type > Create Outlines
This converts your live text into vector paths. Once outlined, Illustrator treats each letter like a shape instead of editable text.
Now you can apply the same perspective techniques using the Free Transform Tool.
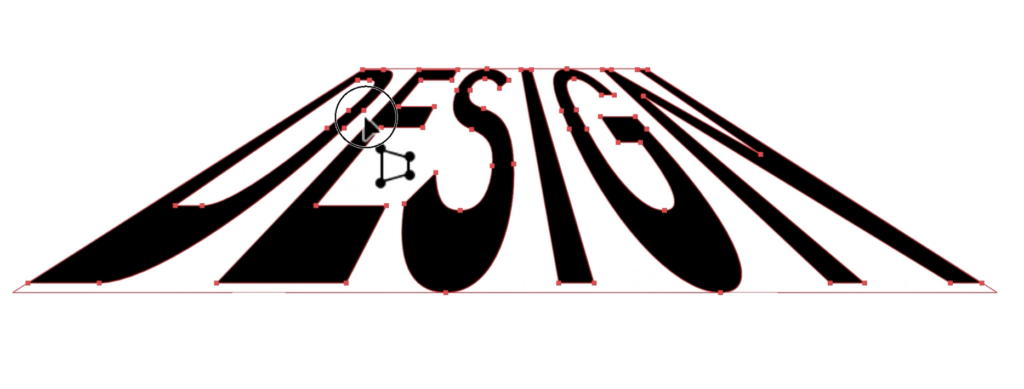
Using Perspective Distort on text can create the illusion that the letters are moving into the distance.
Using Free Distort allows you to create effects where the text appears stretched, angled, or laying down on a surface.
This is especially useful for:
- Poster design
- Logo mockups
- YouTube thumbnails
- Gaming graphics
- Sports typography
- Social media graphics
Even simple words become much more visually interesting when perspective is added thoughtfully.
Tips for Better Perspective Effects
When practicing how to distort the perspective of an object using Adobe Illustrator, subtlety is important.
Many beginners over-distort their objects, which can make designs look awkward or unrealistic.
Instead, focus on small adjustments first.
Try slightly narrowing the top while widening the base. Then compare the before and after versions to see how depth changes the overall feel of the design.
Another helpful tip is to zoom in closely while adjusting anchor points. This makes it easier to keep both sides visually balanced.
You should also experiment with different shapes and fonts. Bold typography often creates stronger perspective effects because the distortion becomes easier to notice.
As you improve, you can combine these perspective techniques with gradients, shadows, and textures for even more realistic results.
Final Thoughts
Learning how to distort the perspective of an object using Adobe Illustrator is one of those small skills that can dramatically improve your designs. It adds movement, depth, and visual interest without requiring advanced tools or plugins.
The Free Transform Tool is incredibly versatile once you understand how each distortion mode works. Whether you’re adjusting simple shapes or transforming typography, these techniques can help your designs feel more professional and dynamic.
If you’re new to Illustrator, this is a great beginner-friendly technique to practice because it teaches both tool control and visual perspective at the same time.
Open Illustrator, experiment with Free Distort and Perspective Distort, and start seeing how much depth you can add to your artwork with just a few simple adjustments.