Want to know which file type to use for your next design project? Download the free Image File Type Cheat Sheet at the bottom of this post — it breaks down print and web file types so you always export with confidence.
Why You Need to Vectorize an Image in Illustrator
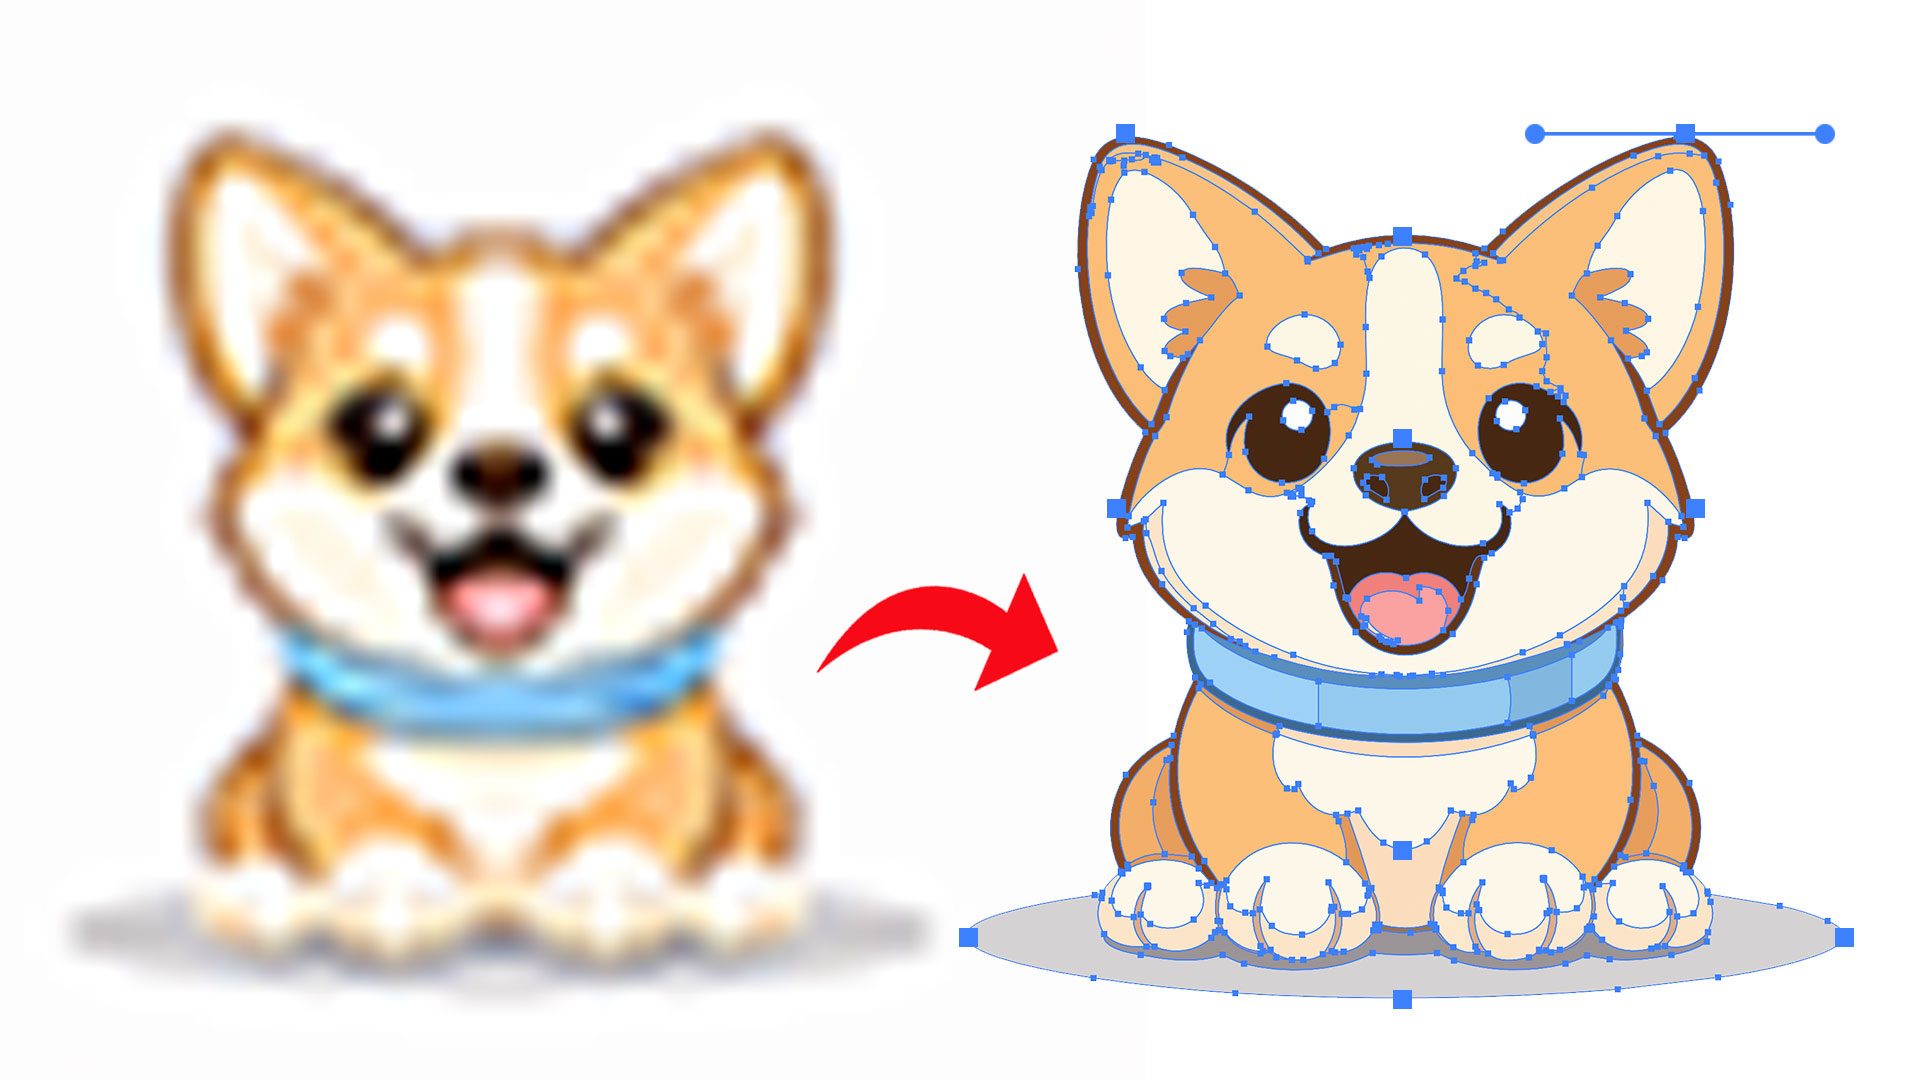
Ever zoomed into a PNG or JPEG and cringed at those blurry, pixelated edges? That’s the reality of raster images — they’re resolution-dependent, which means they can only be scaled so far before things get ugly.
Vector graphics, on the other hand, are made up of mathematical paths and shapes, so they stay crisp and clean at any size. Whether you’re printing a logo on a business card or blowing it up for a billboard, vector files are the professional standard.
That’s exactly why learning how to vectorize an image in Illustrator is such a game-changing skill. And the good news? It’s way easier than it sounds.
How to Use the Image Trace Tool
The magic happens inside Illustrator’s Image Trace function. Here’s how to get started:
First, drag your PNG or JPEG into Adobe Illustrator to open it. Once it’s in your workspace, you’ll find the Image Trace button at the top of your window. If you don’t see it there, head to Object > Image Trace > Make.
When you click Image Trace, Illustrator immediately outlines your graphic — but by default, it converts everything to black and white. Not ideal if your image has color! Head to the Image Trace panel to fix this.
Inside the panel, switch the Mode from Black and White to Color. Instantly, your original colors come back to life. From there, use the color slider to control how many colors are traced — somewhere around 15 tends to give you a clean result without over-complicating the artwork.
Expanding, Cleaning Up, and Saving Your Vector File
Once you’re happy with the trace preview, there’s one crucial step most beginners miss: you have to expand the image. Until you hit Expand, Illustrator is just showing you a preview — it’s not a true vector yet.
Select your image and click Expand at the top of the screen. Now you’ve got real, editable vector shapes.
This is also a great time to clean things up. Use the Direct Selection Tool (the white arrow) to click on and delete the white background so your graphic stands on its own. You can also click into individual shapes to change colors — just double-click a color swatch and swap in your preferred hex, RGB, or CMYK values.
Want to check for stray shapes or weird outlines? Hit Command + Y to view your artwork in outline mode. You might spot a random circle or a concave edge that needs fixing — and this is your chance to tidy those up before exporting.
Choosing the Right Vector File Format to Save
Now it’s time to save — and picking the right format matters. Here’s a quick breakdown:
- AI — Adobe Illustrator’s native format; best for files you’ll keep editing in Illustrator
- EPS — A classic vector format widely used for print production
- SVG — Scalable Vector Graphic; perfect for web use and fully supported in modern browsers
For most web and branding projects, saving as SVG is a smart move. Go to File > Save As, choose SVG, and click OK. You now have a fully scalable, professional-quality vector file ready to use anywhere.And that’s it — you’ve successfully learned how to vectorize an image in Illustrator from start to finish!